Getting started with Heartbeat checks
Monitor your scheduled jobs with Heartbeat checks. Heartbeat checks listen for regular pings from your automated tasks, to ensure that they are running as expected.
Heartbeat checks are available on our Team and Enterprise plans.
What is a Heartbeat check?
A Heartbeat check is a passive check type that expects pings from an external source, such as a scheduled job on a server, at a defined interval. A ping is an HTTP request to a given endpoint URL using either the GET or POST method.
When a ping is not received on time, the check will trigger any configured alerts.
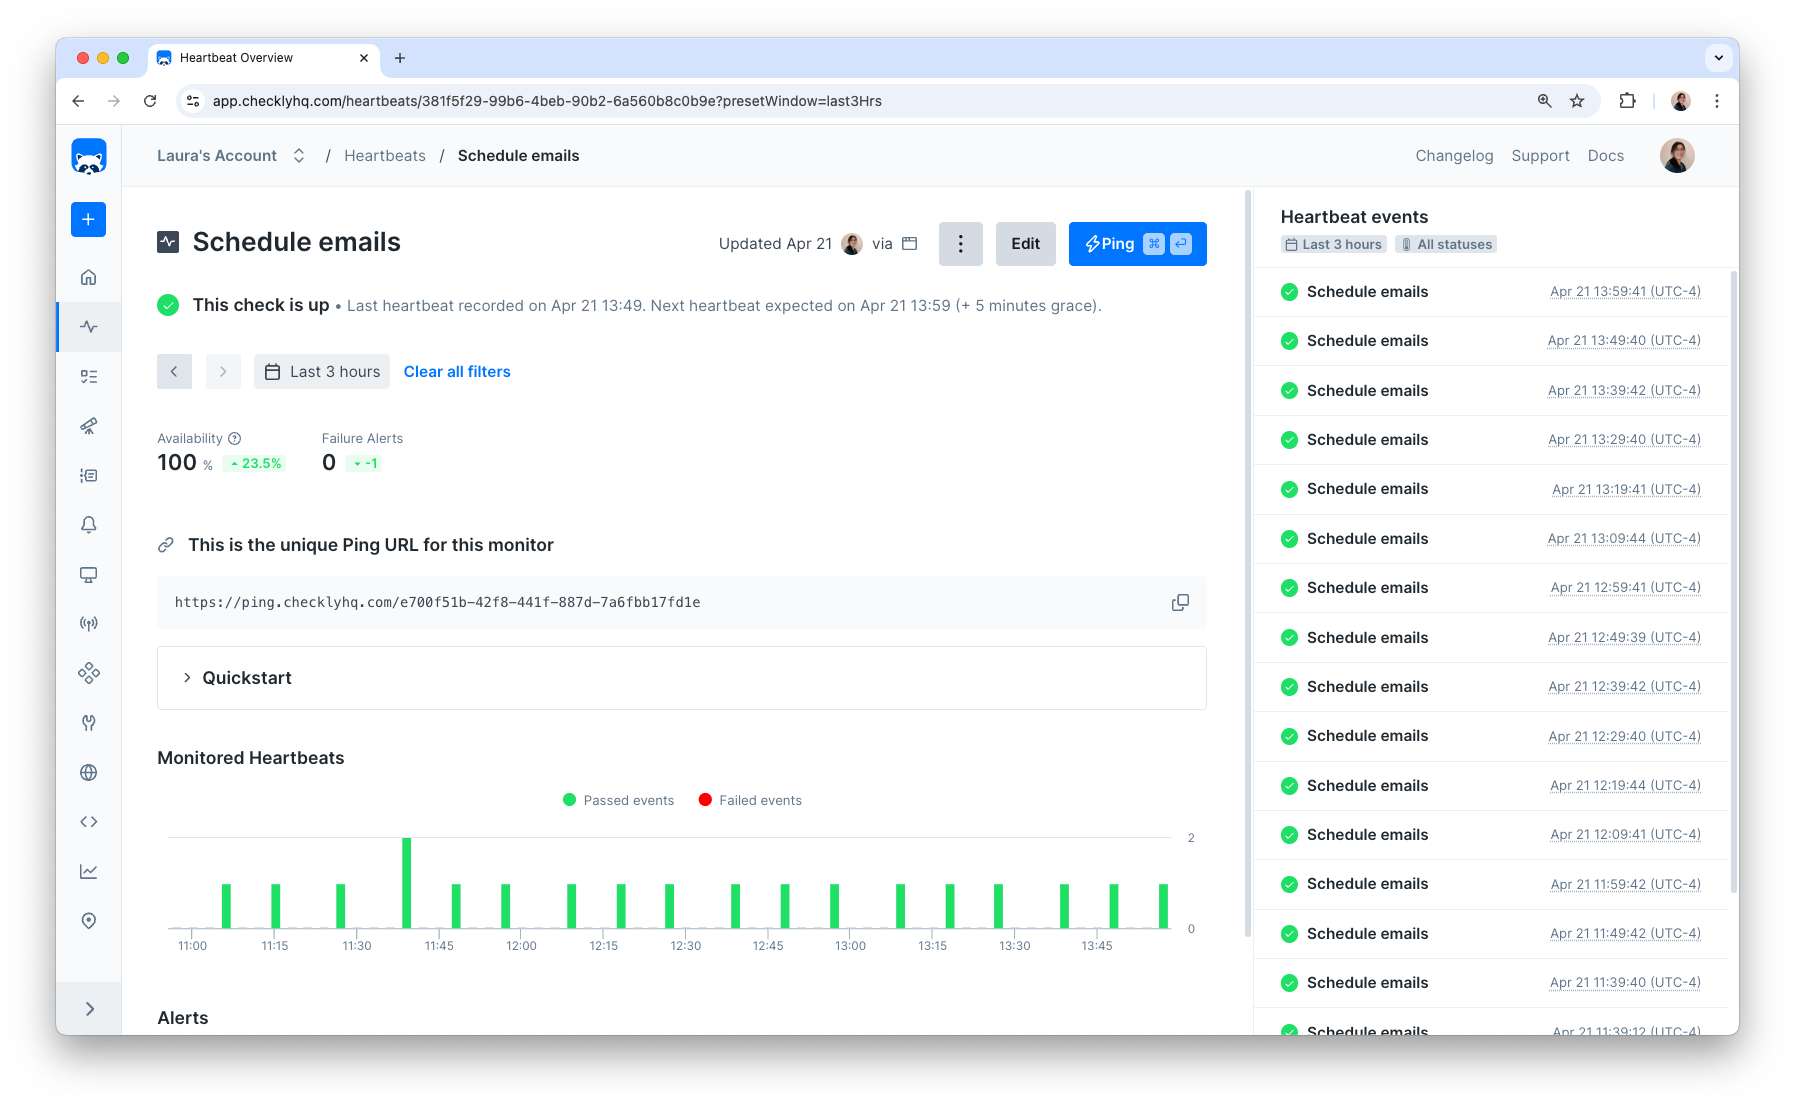
Use Heartbeat checks to monitor backup jobs, data imports, and other recurring jobs or scripts.
For example, this is how you ping a Heartbeat check from a Heroku job:
curl -m 5 --retry 3 https://api.checklyhq.com/heartbeats/ping/bcd964a7-6f15-49a5-bac1-4be8059670ec
Note the retry and timeout options. We recommend enabling retries when possible, to avoid false alarms due to temporary network issues or similar. You should also specify a timeout so that the ping doesn’t block your ongoing job.
Creating a Heartbeat check
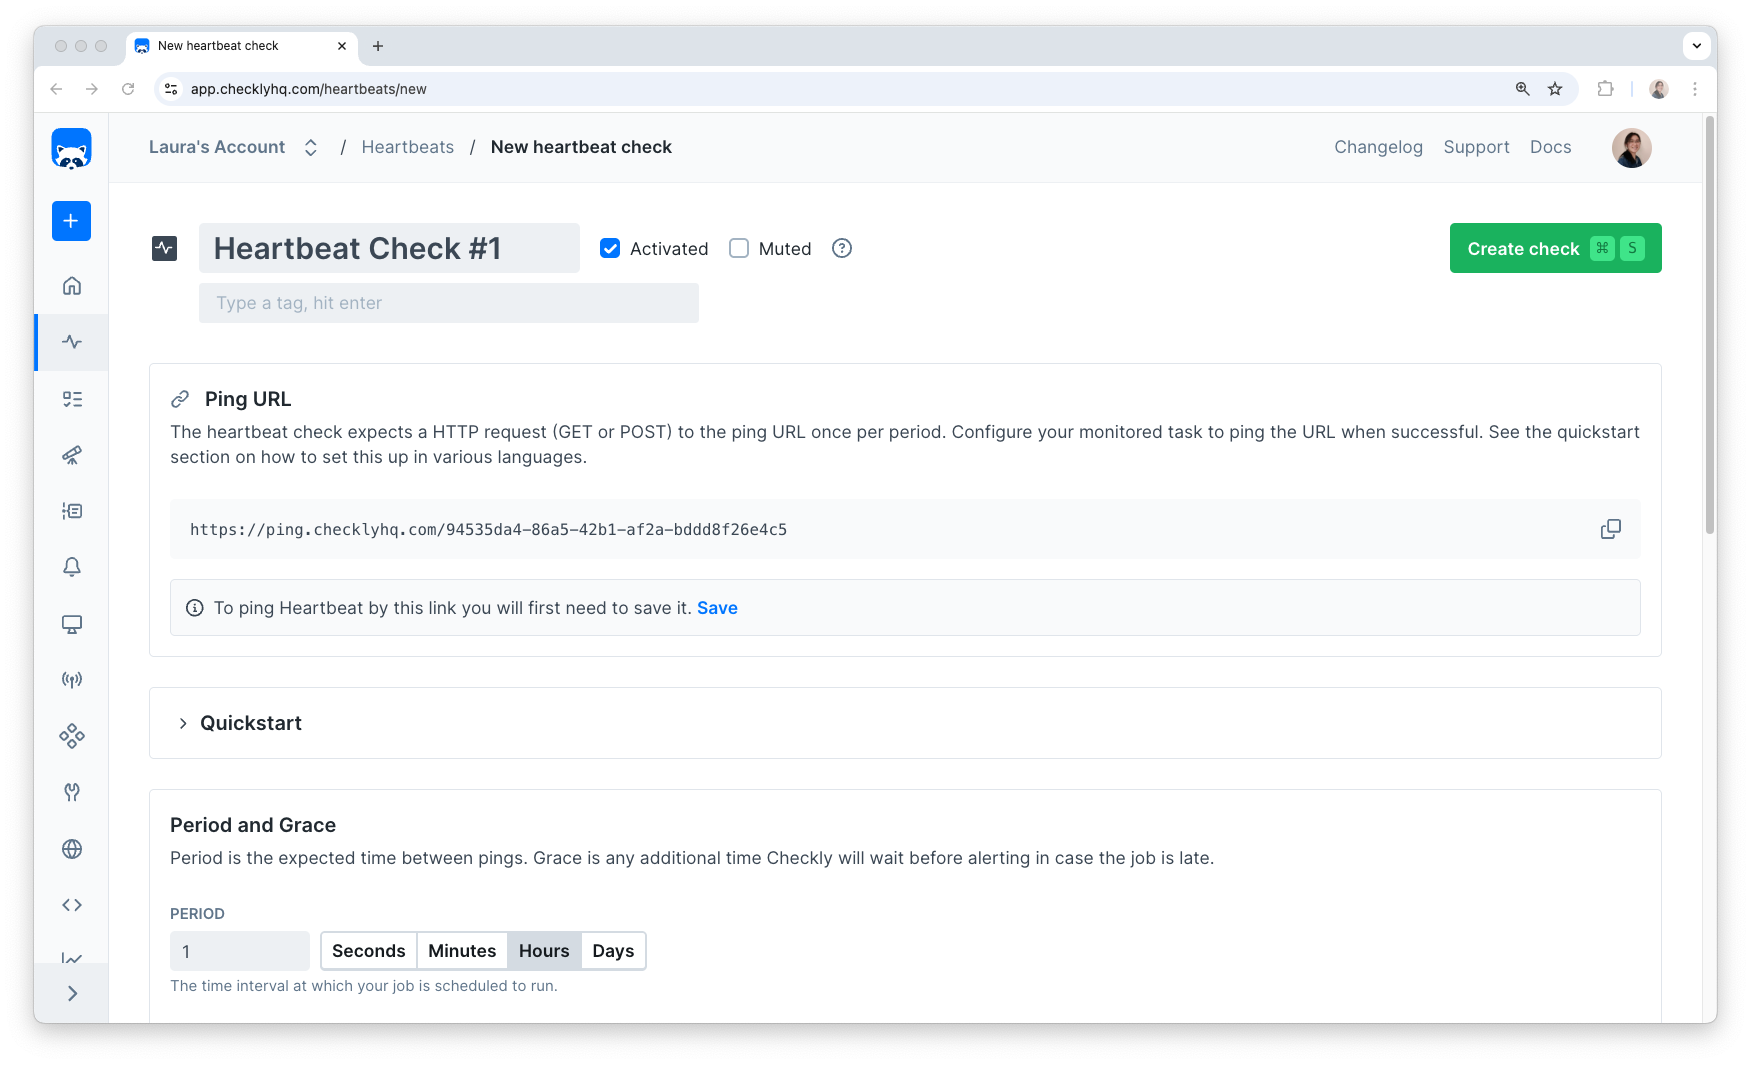
Name and tag
A meaningful name will not only help you and others identify your checks within Checkly, but it will help provide a better alerting experience if your checks fall into an alert state.
Tags can relate your checks together. They also determine which checks are shown on your dashboards.
Ping URL
This is the URL your check listens to for pings. Your scheduled job should send a ping to this URL when successful, once per the configured period.
Period and Grace
Period defines how often you expect a ping to the ping URL.
Grace is the amount of time Checkly will wait before triggering any alerts when a ping does not arrive within the set period. E.g., if you have a check that expects a ping every 60 minutes, with a grace of 10 minutes, no alarms would trigger until 70 minutes after the latest ping.
Use grace to compensate for variance in your jobs.
Alerting
You can configure any of the provided alert channels for a Heartbeat check. If we don’t provide your preferred alert method, use webhooks to configure your alert flow.
Pinging your Heartbeat check
Once you’ve created your check, configure your scheduled job to send an HTTP request to your check’s ping URL. For examples of how to do this, see ping examples.
This should be a GET or POST request. Your check won’t count PUT or DELETE requests as valid pings, and the endpoint will return an error.
You can set request headers to indicate the source of the ping. The source is parsed from the origin request header, falling back to referer if needed. If both are missing, the source will be blank.
Note that some user-agents are blocked to prevent false-positive pings from bots.
We’re currently blocking Twitterbot, Slackbot, Googlebot, Discordbot, Facebot, TelegramBot WhatsApp, and LinkedInBot.
Please note that this list might change in the future.
Manual pings
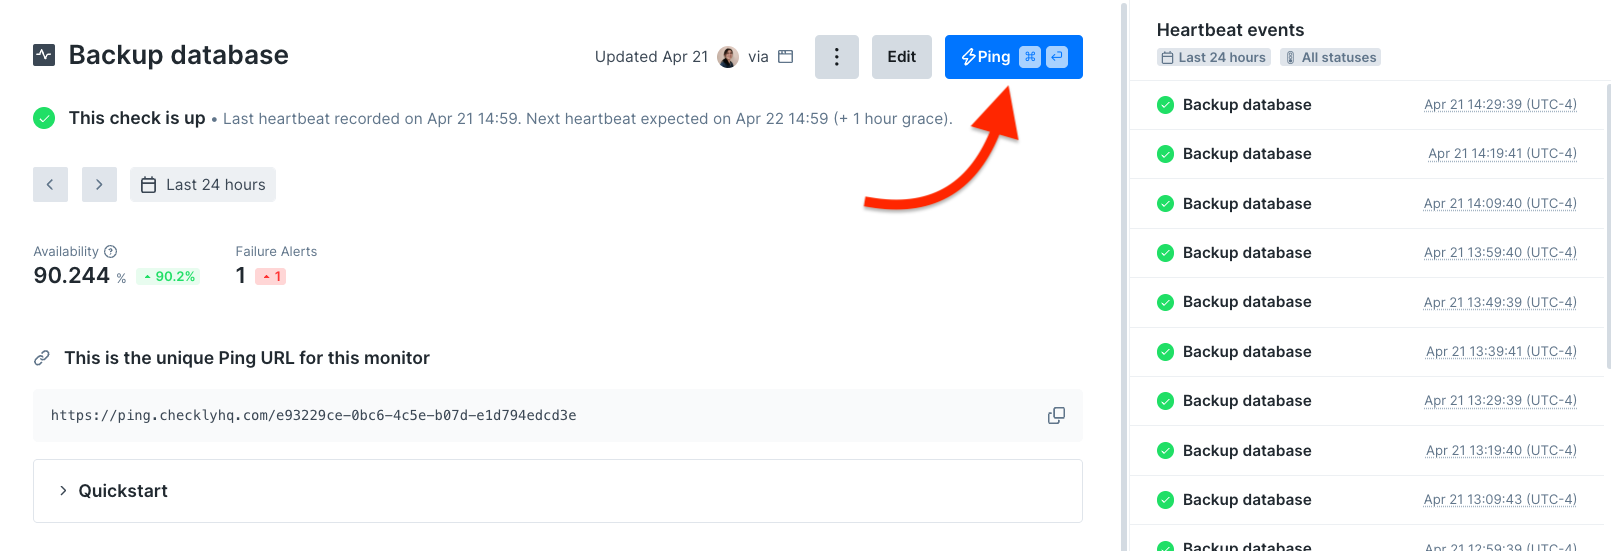
You can manually send pings via the Checkly UI. Use this to start the check timer when a check is first created or to silence alarms.
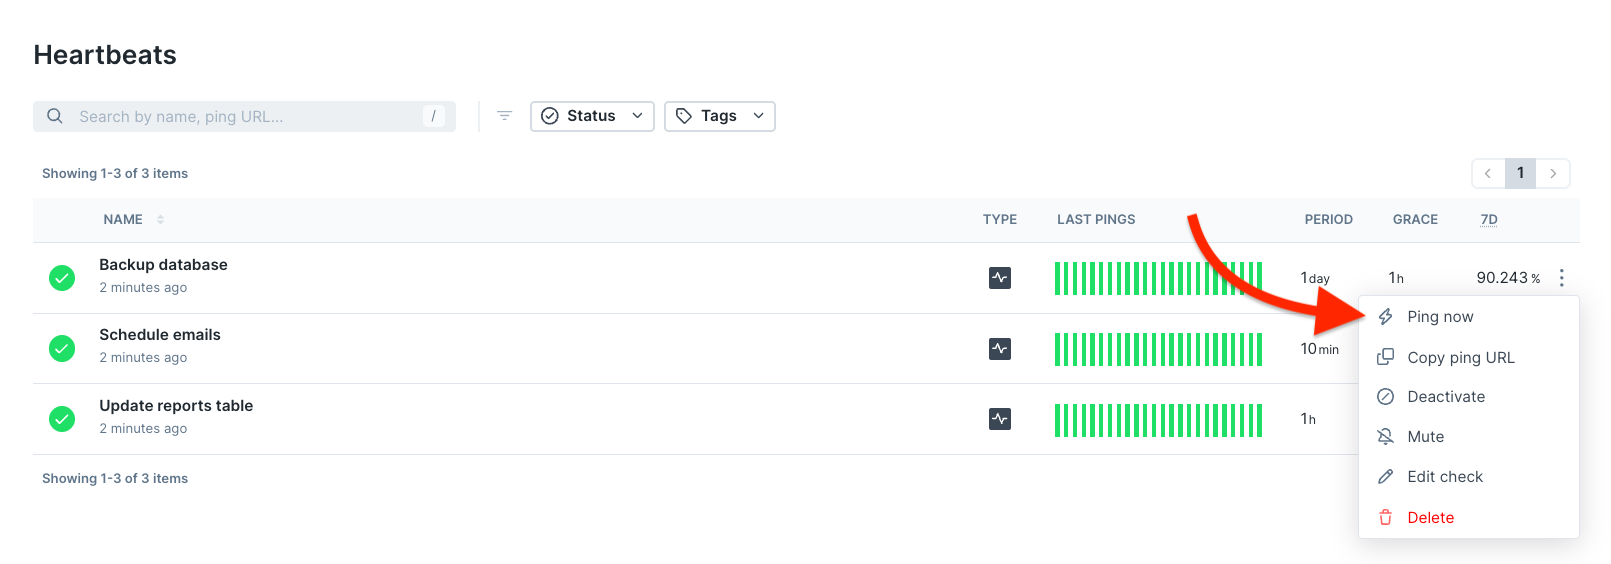
“Ping now” is also available in the quick menu in your list of Heartbeat checks.
How does the timer work?
The check timer starts when it receives its first ping and will reset after each ping or triggered alert.
If you have a check that expects a ping every 60 minutes starting at 09:30, and it receives a ping at 10:00, it will reset the timer to expect a ping before 11:00. If the check does not receive a ping before 11:00 plus the configured grace period, it will trigger any configured alerts.
Every ping or triggered alert will reset the timer of the next expected heartbeat ping.
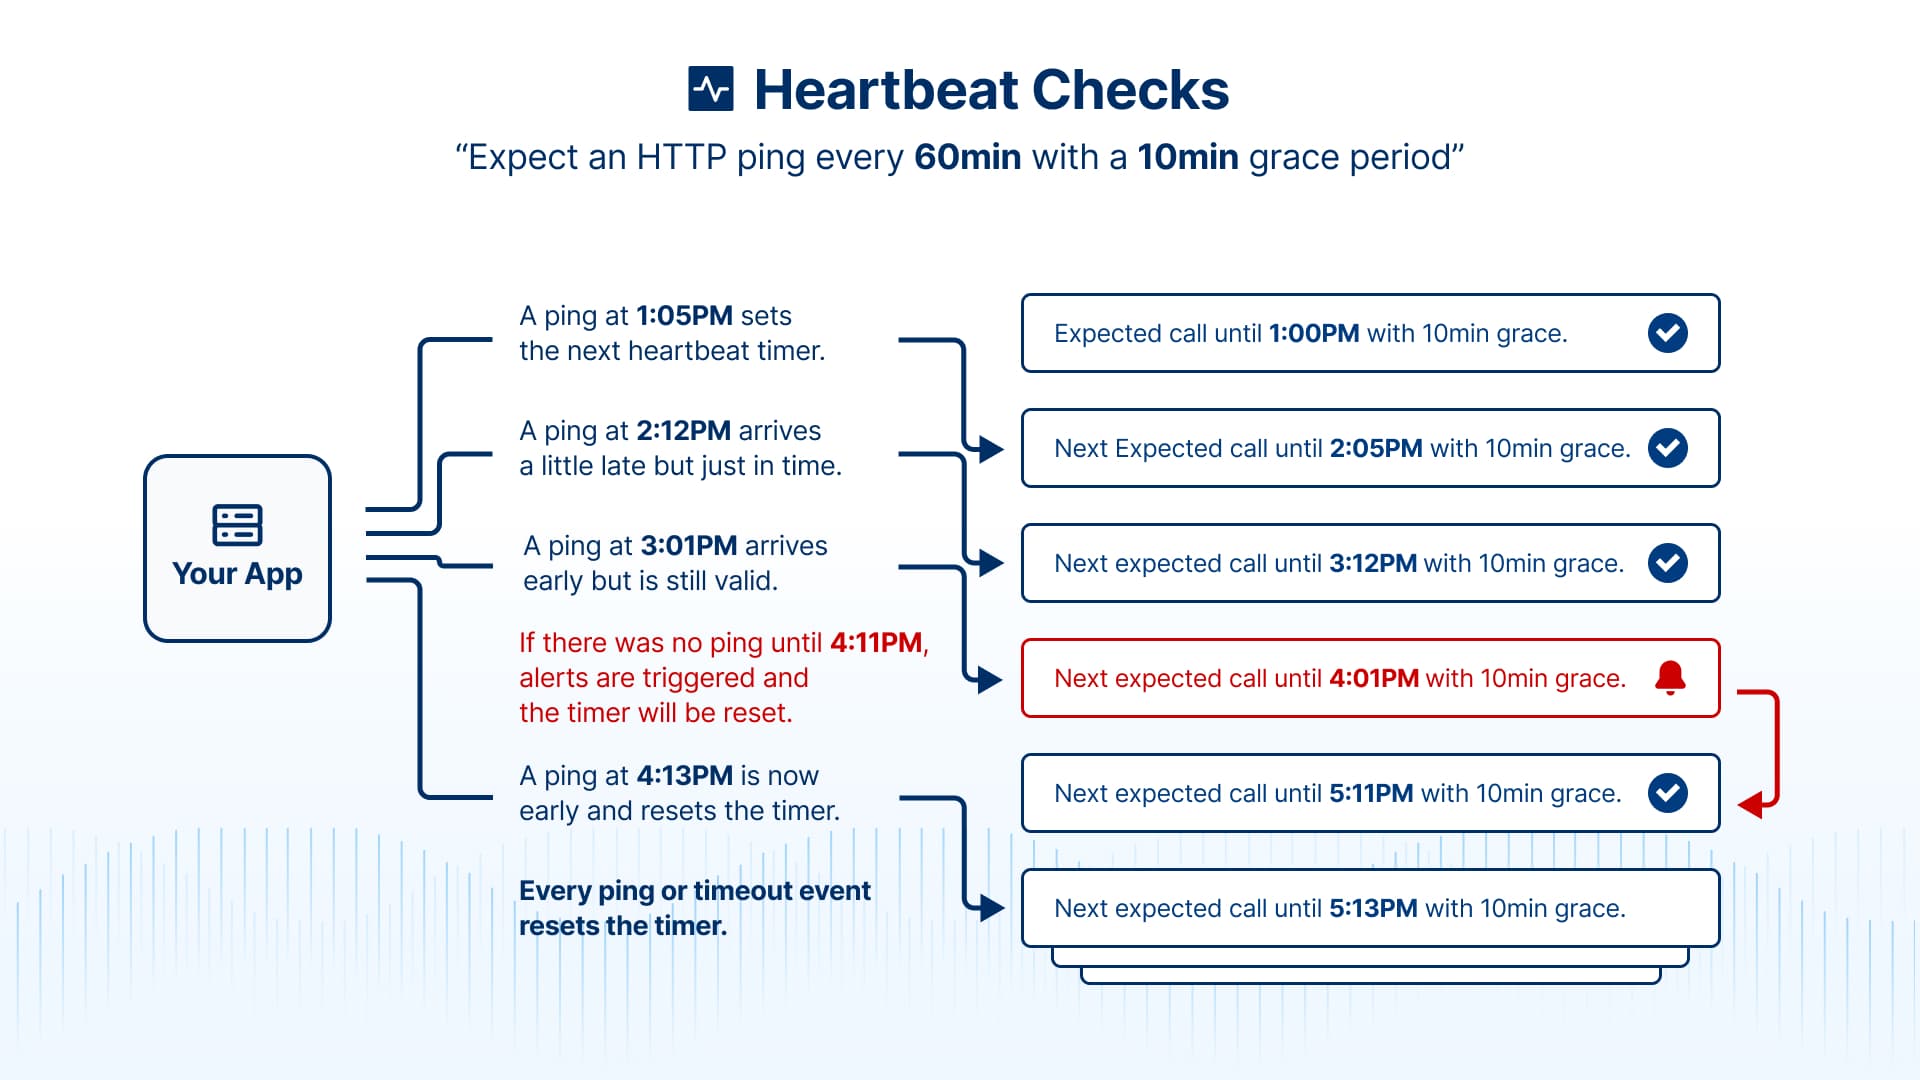
When a check is deactivated and activated again, the timer will start when the check is saved. This is also the case when changing the period of a check.
CLI example
The Checkly CLI gives you a JavaScript/TypeScript-native workflow for coding, testing and deploying synthetic monitoring at scale, from your code base.
You can define a Heartbeat check via the CLI. For example:
import { HeartbeatCheck } from 'checkly/constructs'

new HeartbeatCheck('heartbeat-check-1', {
  name: 'Send weekly newsletter job',
  period: 7,
  periodUnit: 'days',
  grace: 2,
  graceUnit: 'hours',
})
const { HeartbeatCheck } = require('checkly/constructs')

new HeartbeatCheck('heartbeat-check-1', {
  name: 'Send weekly newsletter job',
  period: 7,
  periodUnit: 'days',
  grace: 2,
  graceUnit: 'hours',
})
The above example defines:
- The
nameof the check. - A
periodof 7 days and agraceof 2 hours.
For more options, see the Check construct reference.
Next steps
- Learn about the benefits of Monitoring as Code.
- Interpret your Heartbeat check results.
Last updated on May 6, 2025. You can contribute to this documentation by editing this page on Github